
After you’ve written a book, got it edited, typeset, and got a cover designed, it’s time to self-publish your book. Ingramspark is the largest distributor in the world and offers print-on-demand distribution for self-publishers.
This article will walk you through the steps involved in distributing your book through Ingramspark.
Step 1: Create an Account
Visit https://myaccount.ingramspark.com/Account/Signup and create an account.
Fill in your name and email address in the blanks provided, and fill in a secure password to go along with your account.

Be sure to tick the captcha “I’m not a robot” to ensure the system that you’re not making a spam entry. Check the optional “yes” to receive emails from IngramSpark on free tips and promotions about the book publishing industry, or just click “Create Account” immediately to get started.
Step 2: Confirm Email
After clicking “Create Account,” you’ll be redirected to a page asking you to confirm your email, with 7 days to do so. If you didn’t like what you used to create your account or made a mistake, you can simply click back on the homepage to start over.
Log in to the email you used to create your account at IngramSparks, and open the link that was sent to you by ingramsparksupport@ingramcontent.com to confirm your account, or copy paste the link into the url of your browser of choice.
Once you have validated your account, you will be redirected to the IngramSpark website. Click on the “Log In” Button on the upper right menu of the website to proceed with the next step.
Step 3: Accept the Website Policies
Once you have logged into your account, you’ll be asked to click on “agree” with the Terms and Conditions of using the site as well as the Privacy statement.
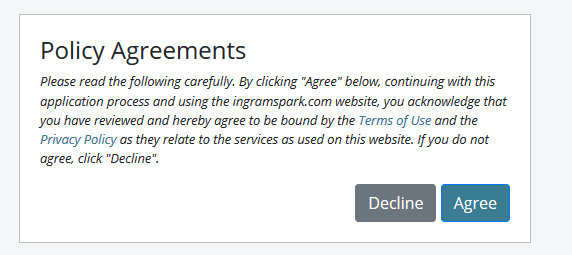
Click on the blue hyperlinks to read the Terms of Use and Privacy Policy in detail, and then click on “agree.”
Step 4: Fill in Your Info

After agreeing to IngramSpark’s terms and conditions, begin to fill in your information in preparation for book publishing.
For “Form of Business,” if you have no business or official publishing company, it’s best to tick “Sole Proprietor.”
After completely filling in the required entries for “Business Info,” click on “Continue” below to proceed to picking a security question and answer for “Security.” Click on “Continue” again.
You will be asked to read and accept the agreements as stated beforehand.
Step 5: Read and Pick Which Agreements to Accept

Simply click on the blue hyperlinks for each agreement on the leftmost column to read the agreements in detail, then tick them using the central column for “I Accept.”
Note that only two of the agreements, the Global POD Agreement and the Global Ebook Agreement are mandatory, whereas Apple (Agency) Ebook Agreement and the Amazon (Kindle) Ebook Addendum are optional and do not have to be ticked should you so wish.
Once you have read and accepted the agreements you’ve chosen, give your electronic signature by typing your full name out in the entry below the italicized fineprint, under “Signature” entry.

Step 6: Finish Setting Up Your Account

You will be greeted with a Welcome page and the invitation to finish setting up your account. Click on the rightmost button to do so.
You will be taken to the “Compensation” portion of the process. Select which currency you’d like to be paid in, although be informed that if you wish to be paid via PayPal that you must select USD as your currency.

Once you’ve selected your currency of choice, fill in your payment information by choosing which type of payment method you’re undergoing (Electronic transfer or Paypal), and filling the following entries below it.
Double-check to ensure the accuracy of your information, click on “Save,” then press the “Continue” button on the rightmost corner to proceed.
On the “Payment” section, you must provide either a credit or debit card before moving on. Click on “Add card” and fill out the required entries, then click on “Submit” to continue to finishing the Tax portion.
Step 7: Add your Book on your Finished Account
Go to the “Titles” tab under the left column menu on your account homepage, and select the format of choice for your book.

After choosing a format, you’ll be asked to upload the files, or to do so later.

If your files are all ready, please consult the file creation guide for print files or the EPUB publishing guidelines for ebook files. If you have ALL the required files, from book cover to print interior, etc., then check the appropriate boxes.
Be advised, if you have not finished the account setting process earlier you will not be able to upload any files, although you can still add metadata for your books.
Click on “print, distribute, and sell book” and the blue “Continue button” should be available to you.
Step 8: Fill in Metadata about your Book
Now comes the fun part! Simply fill in all the required entries for your book and click on the “Continue” button on the bottom to proceed to each section of this stage to finish publishing your book.

If you do not have an ISBN for your book yet, IngramSpark can provide one for you, but please note that this ISBN can be used only with IngramSpark and cannot be used with Amazon’s KDP. We suggest that you buy an ISBN from Bowker for $125 per ISBN, you will need an ISBN for each format of your book.
Once you have filled out everything up to “Validation,” you should have completed the “Payment” process or completed it during account setup earlier to proceed with your order (25$ for just the eBook format, and 49$ for print or both).
Once you are done, check back in 7 days and your book should be available in most online retailers.